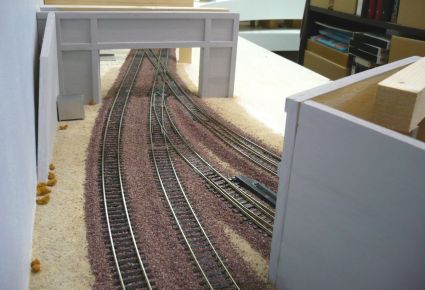
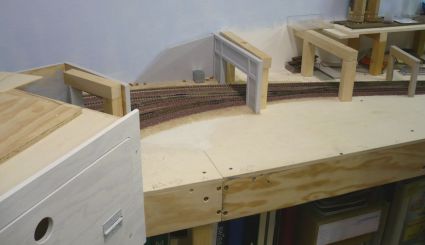
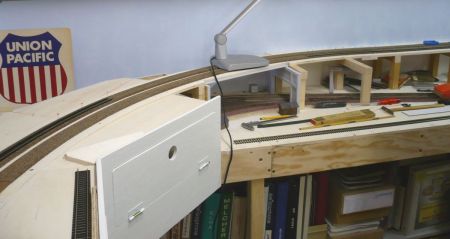
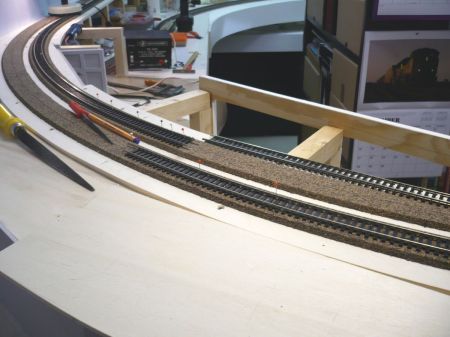
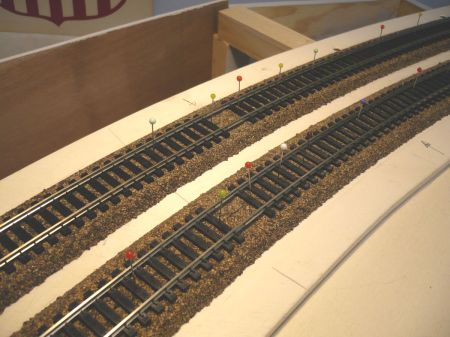
| 9/21/08:
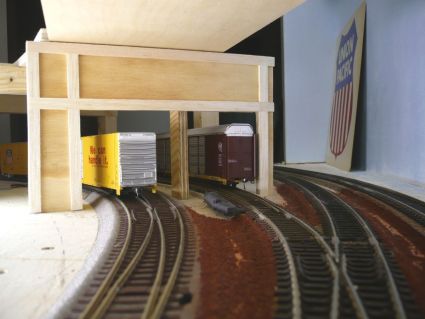
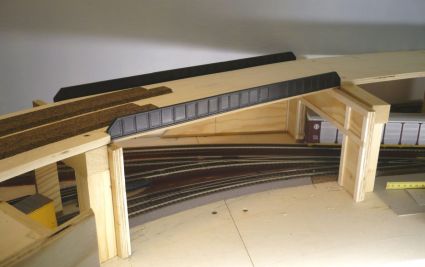
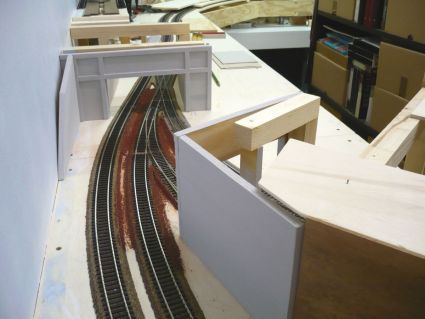
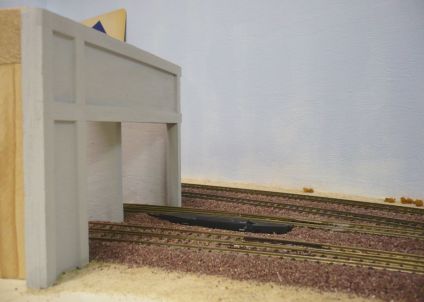
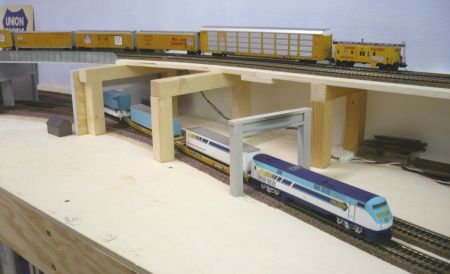
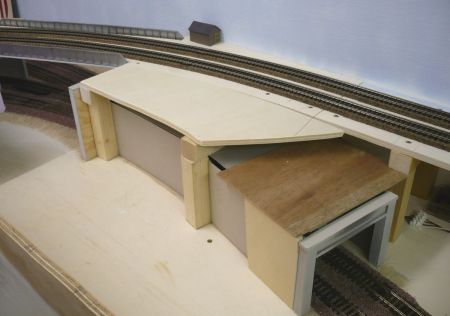
The correct ballast has arrived and therefore, the part under the bridge
has to be prepared for landscaping and ballasting. As bridge support, I am
using the 2 tunnel portals made out of plywood. I mounted strips of balsa
to make a realistic portal. The retaining walls are done the same way. |
 |
 |
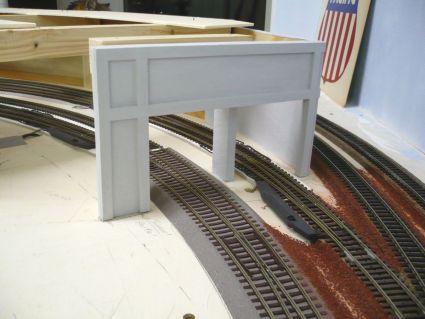
| 9/21/08 Portal to
enter the staging yard - 304 |
Portal for the
main lines- 305 |
 |
 |
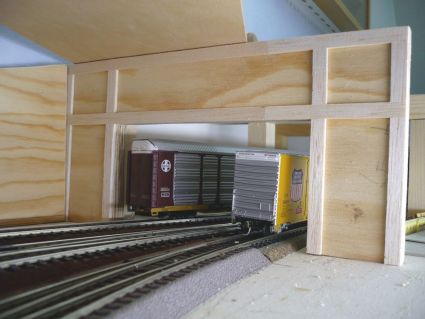
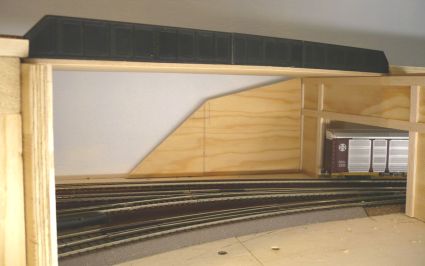
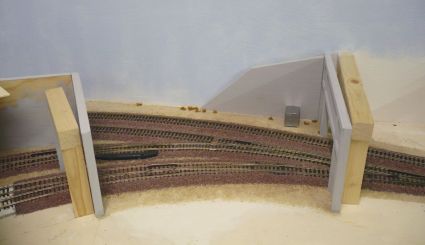
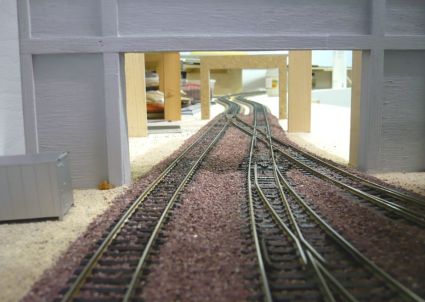
| 9/21/08 The
portals are also the support for the bridge - 306 |
The main lines
will enter a short tunnel - 307 |
 |
 |
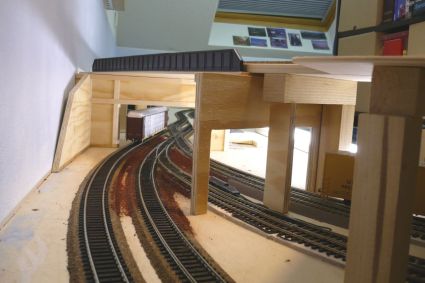
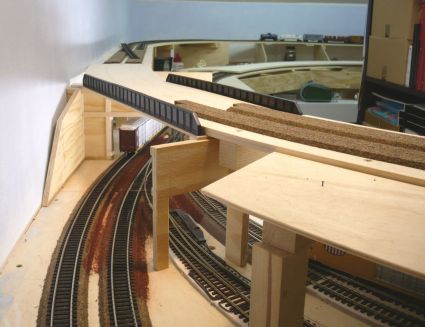
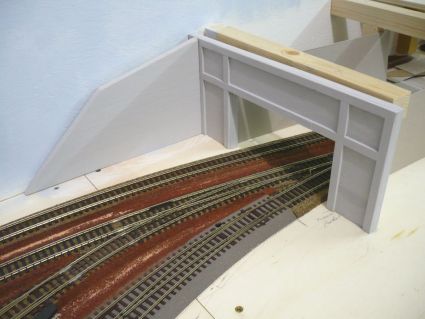
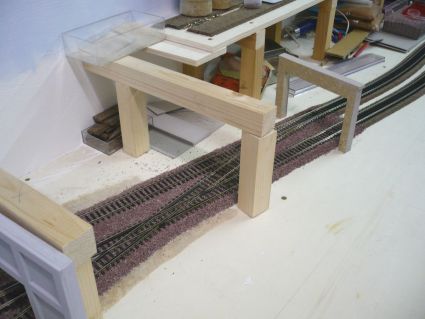
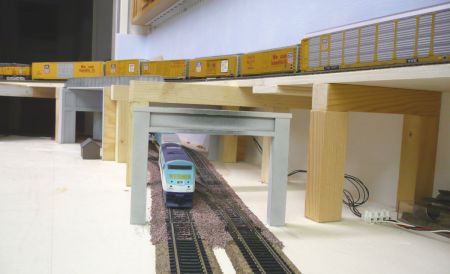
| 9/21/08 Bridge of
upper level - 308 |
Bridge as seen
from above - 309 |
 |
 |
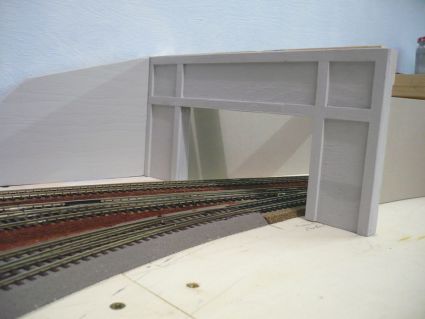
| 9/21/08 Why a
bridge and not a longer tunnel? - 310 |
Because I need
access to the switches as some are manual - 311 |
 |
 |
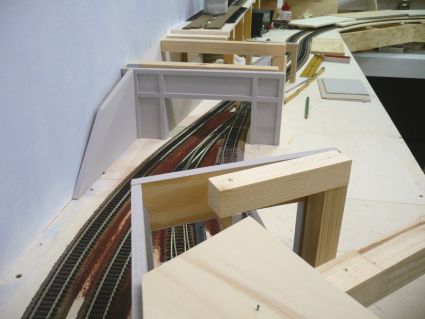
| 9/21/08 The
girders are from Atlas and extended - 312 |
See the bridge
from track level - 313 |
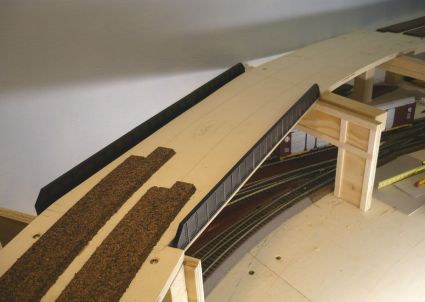
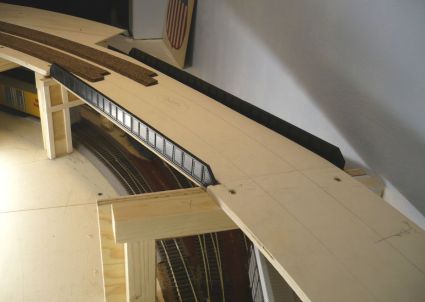
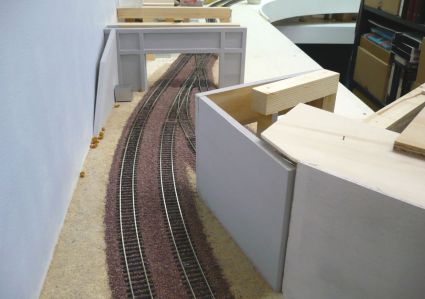
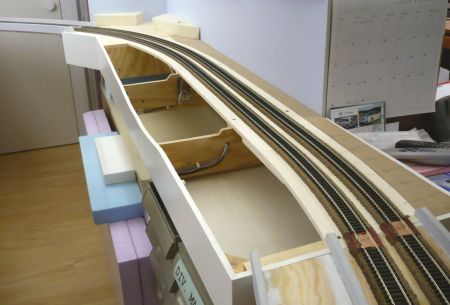
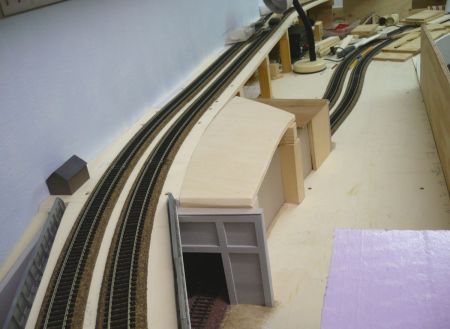
| 9/23/08:
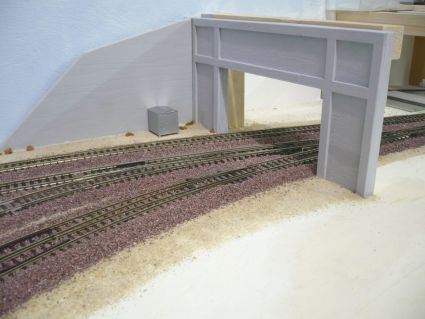
Afterwards, the portals have been painted in my own mixture of concrete
gray. In the meantime the portals and retaining walls are mounted and glued in place. For
better work space, the bridge segment has been removed. It will be mounted
after the landscaping and ballasting is finished. Please note: The brown/red
ballast is not correct and it will be changed to the new ballast. |
 |
 |
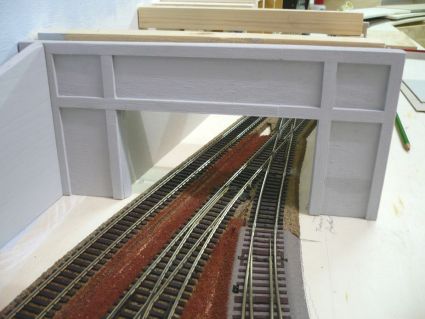
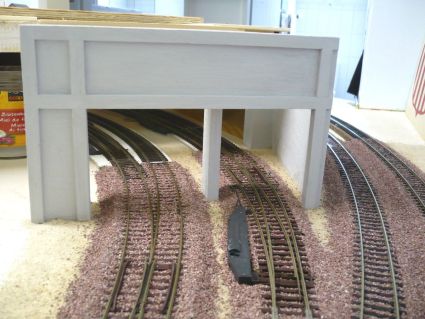
| 9/23/08 Painted
and finished portal to the staging yard - 314 |
Finished portal
with retaining wall is mounted - 315 |
 |
 |
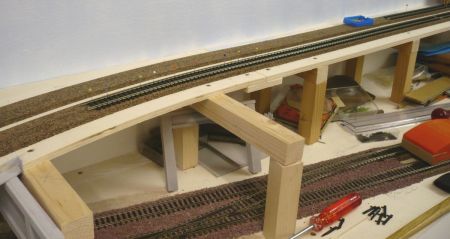
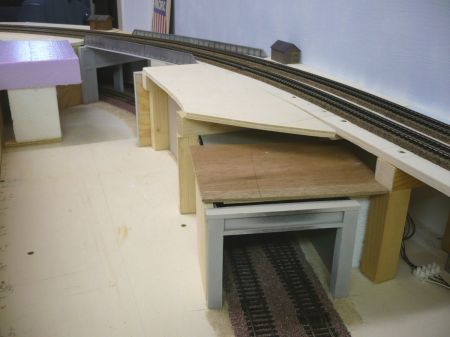
| 9/23/08 The
bridge section was removed - 316 |
Tunnel/bridge
area from above - 317 |
 |
 |
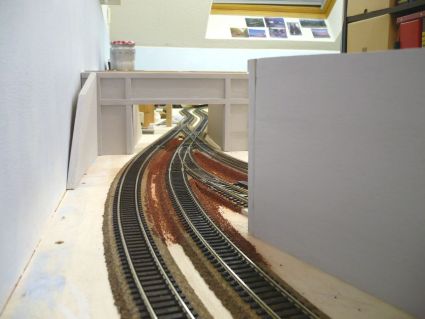
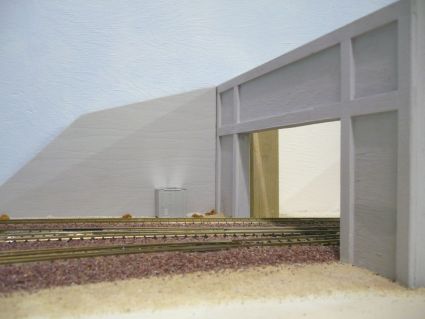
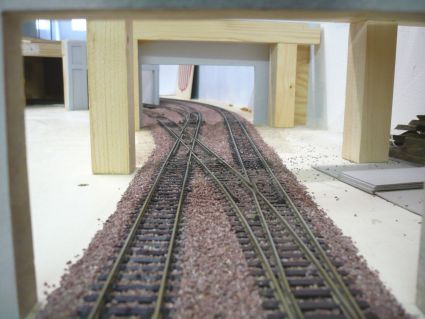
| 9/23/08 Nice view
thru the tunnel with main line - 318 |
Intersection with
switches for the yard - 319 |
 |
 |
| 9/23/08 Yard
entrance and main lines to the right - 320 |
These switches
are manual and need access - 321 |
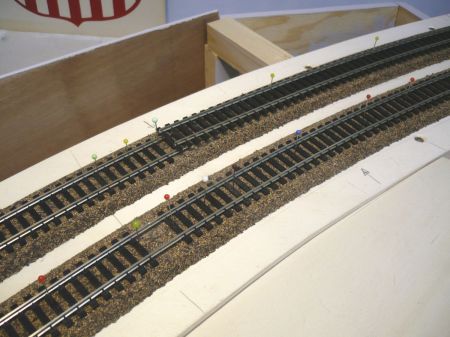
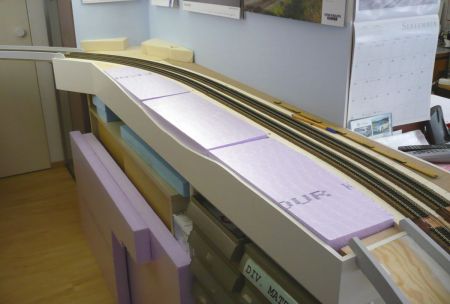
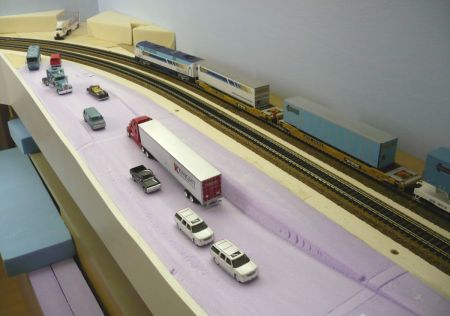
| 9/28/08:
After all, I was able to start with the correct ballast below the
bridge and inside the short tunnel. My intention was to use a similar ballast
called "Desert Rose" like BNSF was using for the 3rd Main Track
Construction over Cajon Pass. Here are a lot of photos of the 3rd Main
Track Construction: http://www.trainmaster.ch/cajon-01.htm
Color Canyon Materials in Arizona is producing the correct ballast in HO
scale (other grades as well) with the name "Purple Haze". It is
grinded from the real rocks and should look like the original. For those
who are interested in CCM's Natural Rocks for Miniature Landscaping, go to
their web site: www.colorcanyonmaterials.com The
result on the photos 322 - 339 is very satisfactory and looks like the
real thing. |
 |
 |
| 9/28/08 Mainline
Portal - 322 |
The modern
electrical box (4312) is made by BLM - 323 |
 |
 |
| 9/28/08 Looking
thru the short tunnel - 324 |
Another view from
above - 325 |
 |
 |
| 9/28/08
- 326 Not only ballasting but also landscaping was done at the same time
as the bridge will cover the access afterwards
- 327 |
 |
 |
| 9/28/08 To put
ballast on the switches is always difficult - 328 |
The short tunnel
will be covered - 329 |
 |
 |
| 9/28/08 Once the
upper level is mounted, not much can be seen - 330 |
The 2 tunnel
portals will be used as support for the bridge - 331 |
 |
 |
| 9/28/08 Entrance
to the yard and main lines on right side - 332 |
Other tunnel
portal of the main line is visible here - 333 |
 |
 |
| 9/28/08 This
short tunel will be just 52 cm (20") - 334 |
Looking thru the
tunnel toward the staging yard - 335 |
 |
 |
| 9/28/08 Portal
for the staging yard - 336 |
Looking thru the
tunnel the other direction - 337 |
 |
 |
| 9/28/08 Yard
entrance and main lines - 338 |
Looking from
above where the bridge will be - 339 |
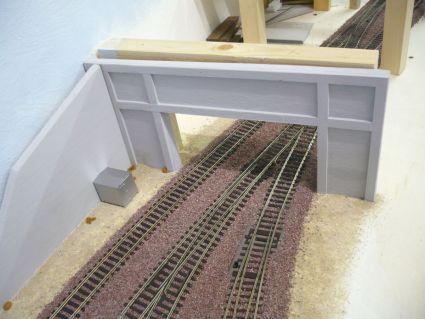
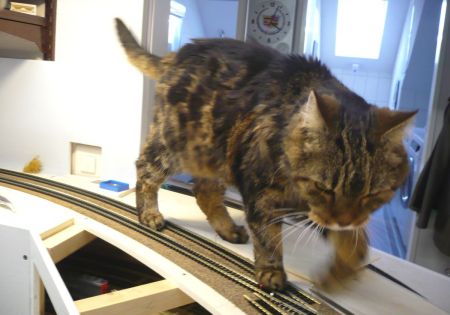
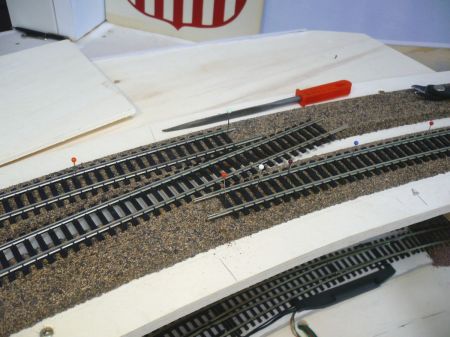
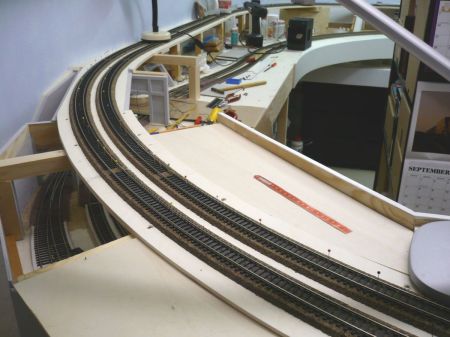
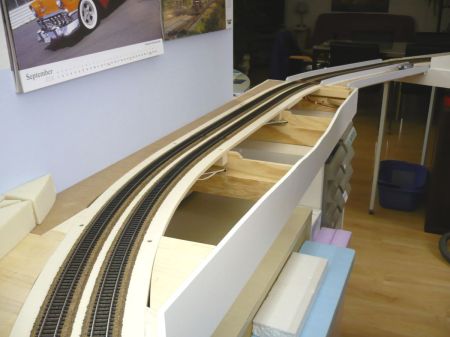
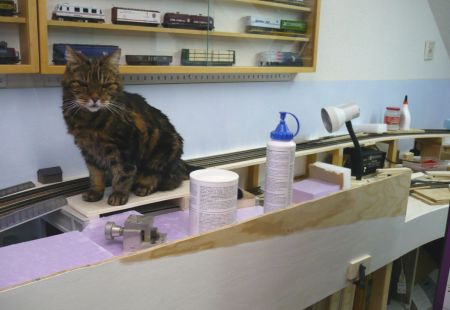
| 9/29/08:
This is the day of the last track laying, in other words, the Golden Spike
was driven. The bridge element is back in place and I was able to start
with cork roadbed mounting. Afterwards, the time has come to place the
last flex tracks and the circle of both main lines will be completed,
today. As always, my track inspector was checking every step to be sure
things are done as per contract. |
 |
 |
| 9/29/08 After
cork roadbed was done, track laying started - 340 |
The remaing track
gap is approx. 2,5 m (8 ft) - 341 |
 |
 |
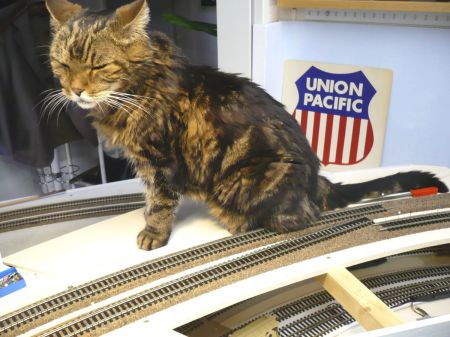
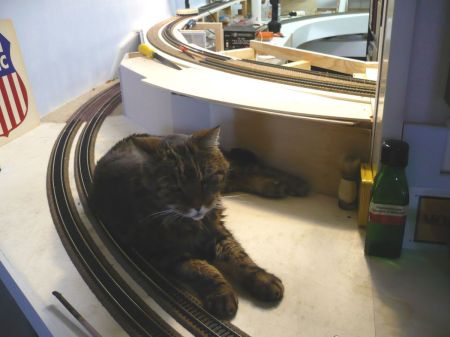
| 9/29/08 The track
inspector is arriving - 342 |
Every corner will
be checked - 343 |
 |
 |
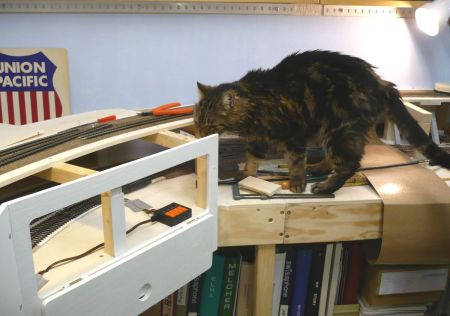
| 9/29/08 Percy said,
the curve looks good, but hurry up as I want to see the first train
running, tonight ! ! - 344 |
Almost the same
process like it happend in Cajon Pass on 9/26/08. See the real thing here:
Cajon track construction (see photo 811) - 345 |
 |
 |
| 9/29/08 Cutting
and realigning the track sections - 346 |
The inspector
takes a rest - 347 |
 |
 |
| 9/29/08 Main # 1
has to be adjusted - 348 |
Main # 2 will be connected any minute - 349 |
 |
 |
| 9/29/08 Both main
lines are connected and complete - 350 |
Pins will be
replaced by spikes (nails) and the Golden Spike is driven - 351 |
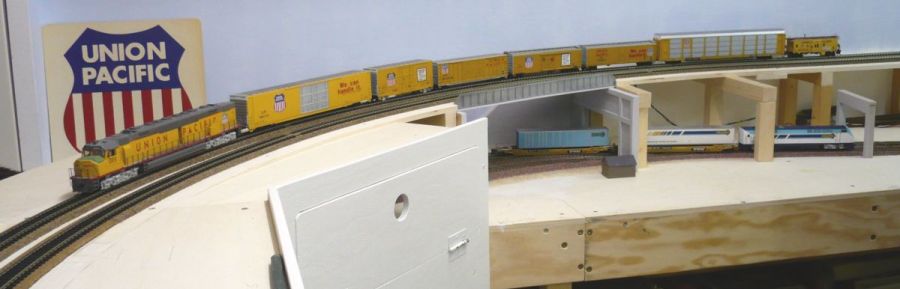
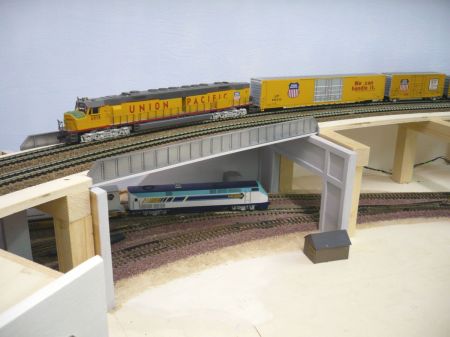
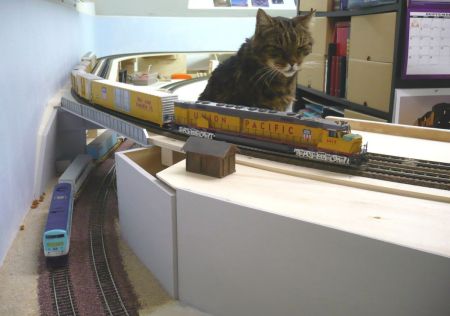
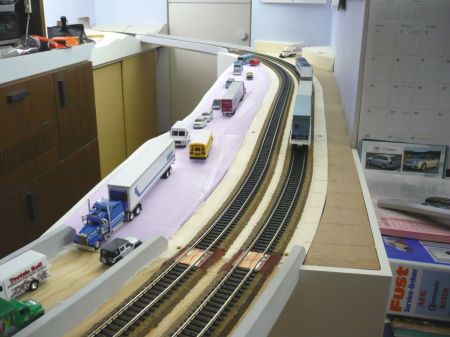
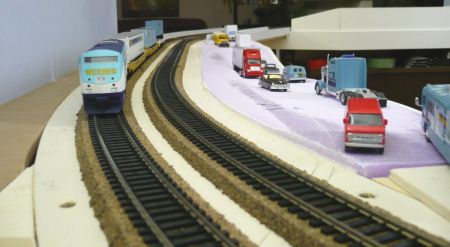
| 9/29/08:
After the Golden Spike was driven, I was making the very first test run
with an Union Pacific Train, lead by EMD DDA40X (Overland Models) and a
Werner Enterprises Special Train. The first rounds worked well without any
derailment. I just made pictures from the overpass area as this was the
last part with track laying. You can see photos from the other parts of
this layout on pages 1 - 3. I am actually glad to have my track laying
completed before BNSF finished the 3rd Main Track over Cajon Pass. Take a
look here: Final track realignments. The good
thing on my layout - I can run trains without ballast ! ! |
 |
| 9/29/08
It is Monday evening, 19.30 h and the first trains are rolling - 352 |
 |
| 9/29/08
UP was running a short freight special and Werner Enterprises made it soon
after - 353 |
 |
 |
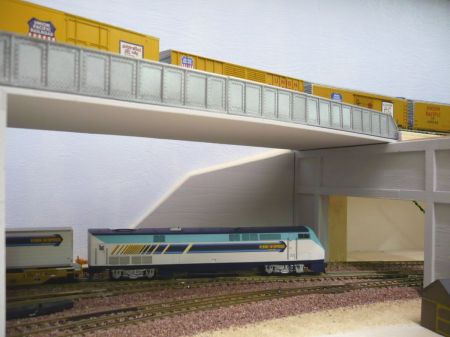
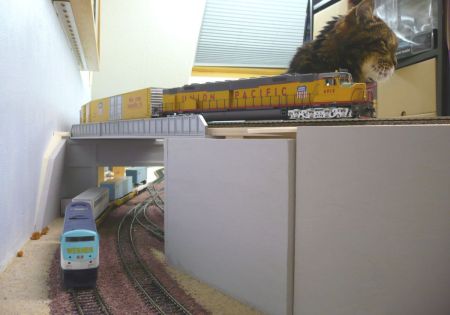
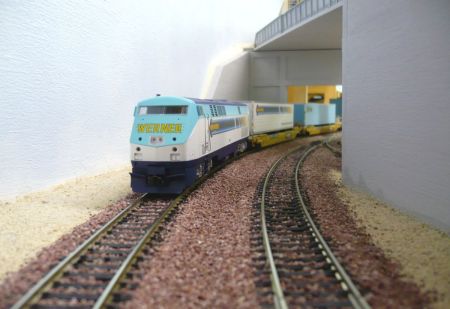
| 9/29/08 This view
will be gone once the tunnel is closed - 354 |
The WE AMD-103 is
coming out of the tunnel - 355 |
 |
 |
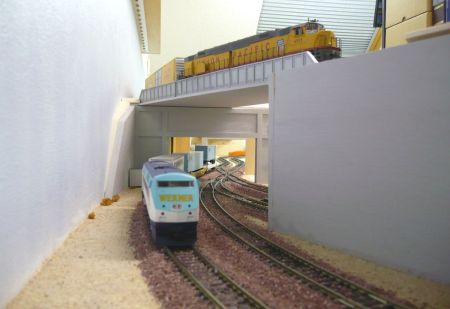
| 9/29/08 UP on top
and WE below - 356 |
Nice view under
the bridge - 357 |
 |
 |
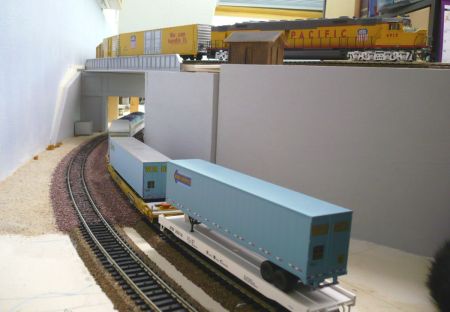
| 9/29/08 Flats
loaded with WE trailers - 358 |
Main # 1 and # 2
are currently blocked - 359 |
 |
 |
| 9/29/08 After
all, the inspector moved and test runs could be done - 360 |
WE is coming on
Main # 1 - 361 |
 |
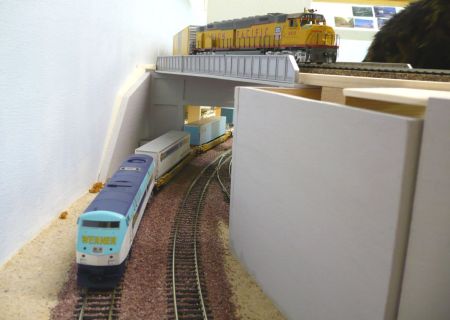 |
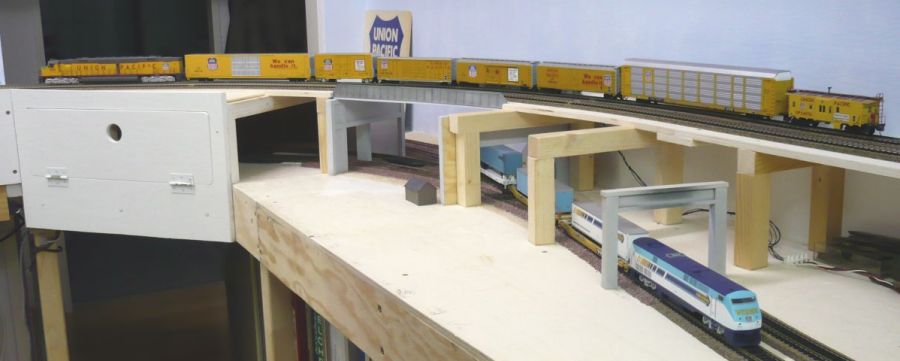
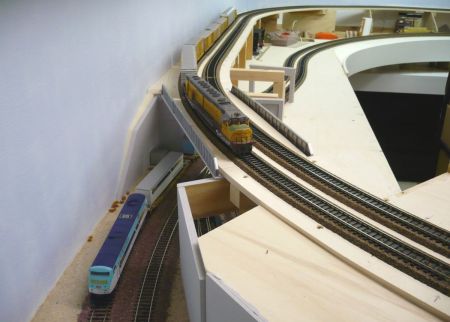
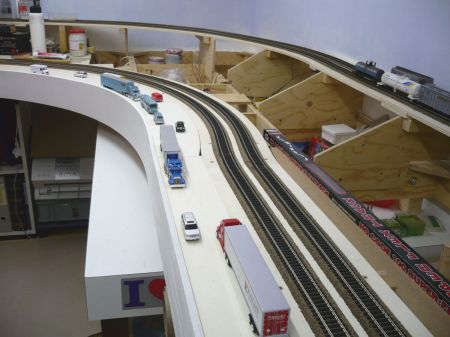
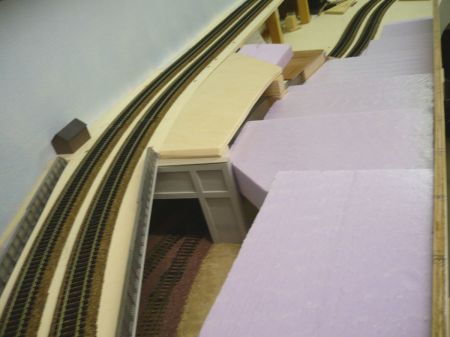
| 9/29/08 Overview
of Bridge / Tunnel area - 362 |
The staging yard
is just at the right side behind the retaining wall - 363 |
 |
 |
| 9/29/08 View from
track level - 364 |
The final frame
for today - 365 |
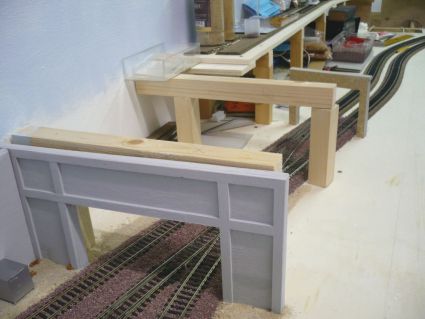
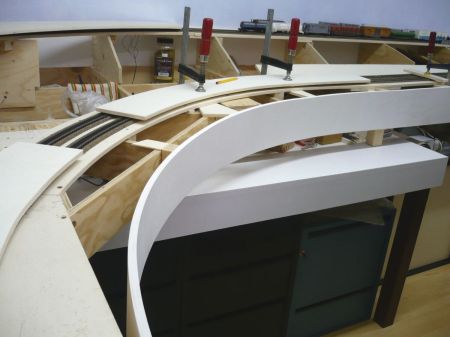
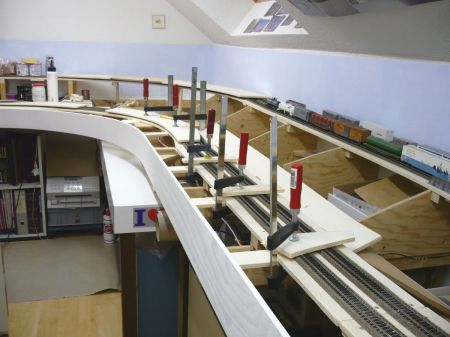
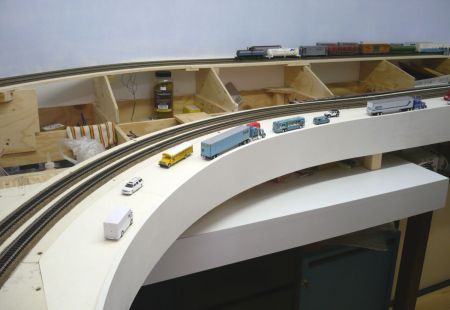
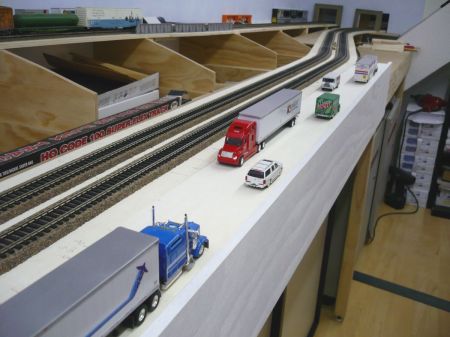
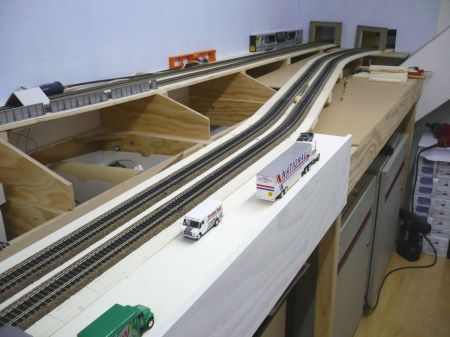
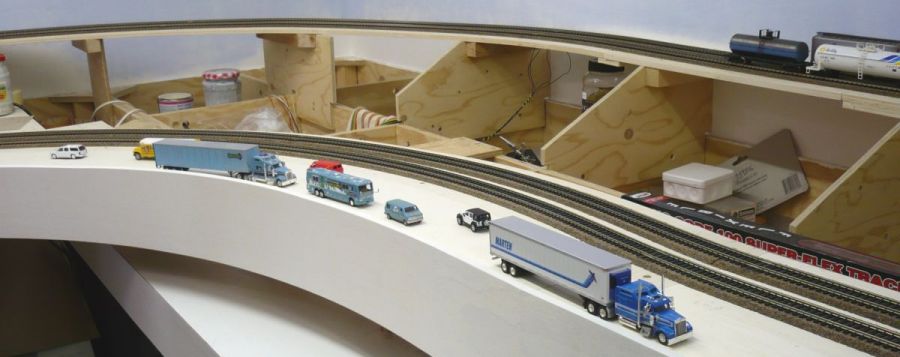
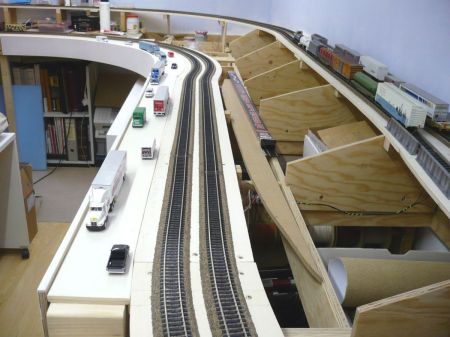
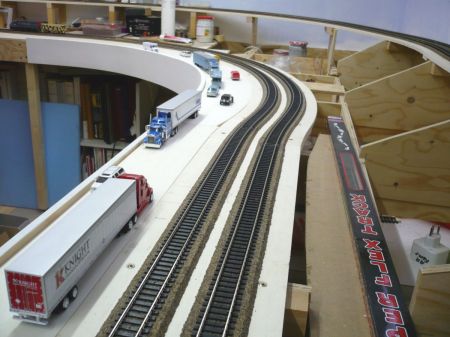
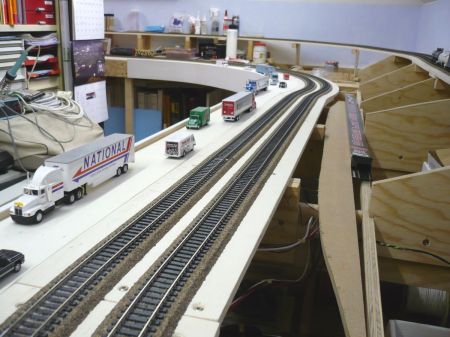
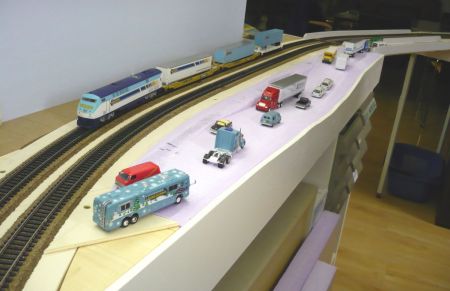
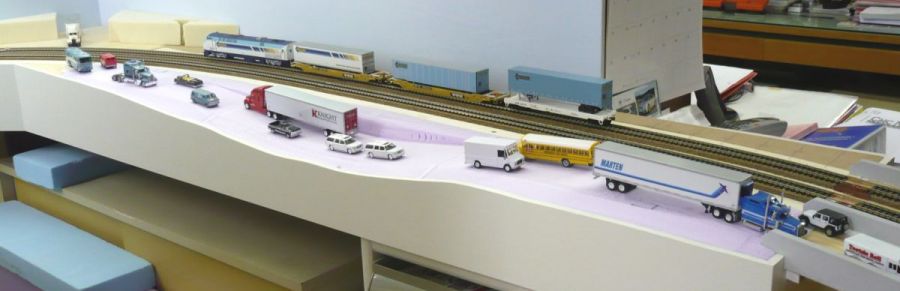
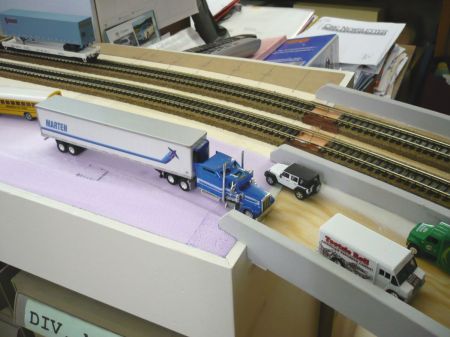
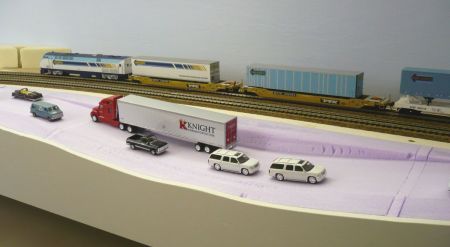
| 9/30/08:
Last Friday, Reto Frick came to finish the last wooden work. He made the
rounded cover of the inside corner. Once again, a great job that could not
be done any better. I painted the boards white and it looks nice. My
layout does not only cover the tracks for the trains, but also streets for
cars and trucks. As there is not much clearance between the tracks and the
outer end of the layout, the road is parallel and on the same level as the
tracks. To get an idea how it will look one day, I put cars and trucks on
the unfinished highway. |
 |
 |
| 9/30/08 The
triangle of the underframe is covered by a curved board - 366 |
Small pieces of
boards are glued under the roadbed to carry the street - 367 |
 |
 |
| 9/30/08 The
inspector is coming for a check up - 368 |
Weight test of the new street is done by the inspector himself - 369 |
 |
 |
| 9/30/08 This
street is going uphill on a 1,5 % grade - 370 |
Looking downhill
- 371 |
 |
 |
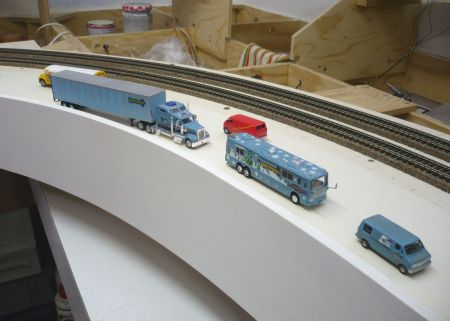
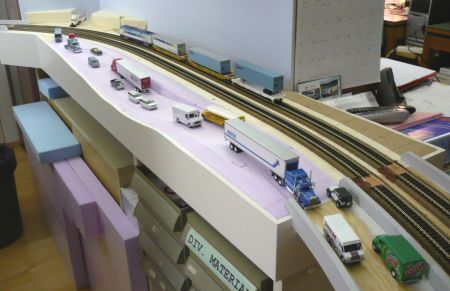
| 9/30/08 Busy
street - 372 |
Heavy traffic -
373 |
 |
 |
| 9/30/08 Are there
maybe some Railfans on the road? - 374 |
The last part of
the street will be going down towards the tunnel area - 375 |
 |
| 9/30/08
Imagine the landscaping and a RR-X-ing will be built over the lower level
and the street will go under the upper level - 376 |
 |
 |
| 9/30/08 Werner
Enterprises with a Van, Bus and Truck - 377 |
The schoolbus is
going to San Bernardino - 378 |
 |
 |
| 9/30/08 Looking
from outside - 379 |
Overview from the
middle - 380 |
 |
 |
| 9/30/08 As seen
from the inside - 381 |
and from the
right side - 382 |
| 10/02/08:
We are now in Office 1 to work on the part between the bridges. As already
mentioned, streets are also important. I was using styrofoam which was
glued between the segments. Afterwards, the styro was sanded down to
street level. I am not sure yet, what cover I will use for the street
surface. |
 |
 |
| 10/02/08 The gaps
beetween the wall and the track are closed - 383 |
Inspector Percy
makes a final check up round - 384 |
 |
 |
| 10/02/08 3
segments will be filled with styrofoam - 385 |
Styro is in place
and ready to be sanded / carved to street level - 386 |
 |
 |
| 10/02/08 First
test run for cars and trucks on the new street - 387 |
On the left side
will be a RR-X-ing - 388 |
 |
| 10/02/08
The street level does not always follow the track level like on Pelle
Soeborg's "the Higway West of Daneville" - 389 |
 |
| 10/02/08
Inspired by Pelle Soeborg's Daneville Layout - take a look on his web site:
http://www.soeeborg.dk/railroading.html
- 390 |
 |
 |
| 10/02/08
Transition point from the combined bridge - 391 |
Still a lot of
work for landscaping and ballasting everything - 392 |
 |
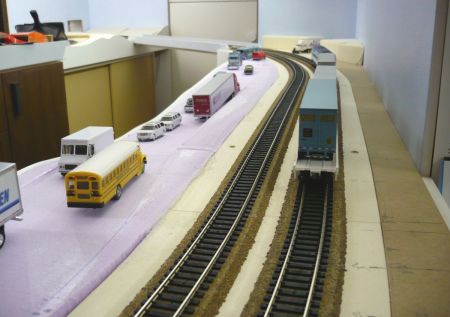 |
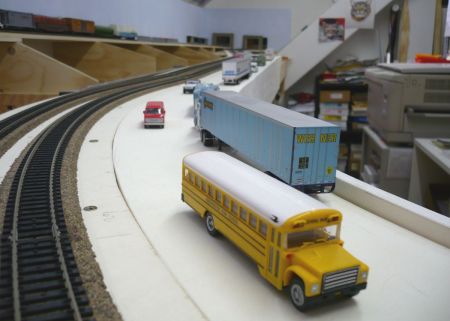
| 10/02/08 See the
proposed RR-X-ing in the background - 393 |
The schoolbus is
coming back from San Bernardino - 394 |
 |
 |
| 10/02/08 VIP's
are on the road with 2 Cadillac Escalades - 395 |
RR-X-ing will be
in front and Werner Ent. is coming against us - 396 |
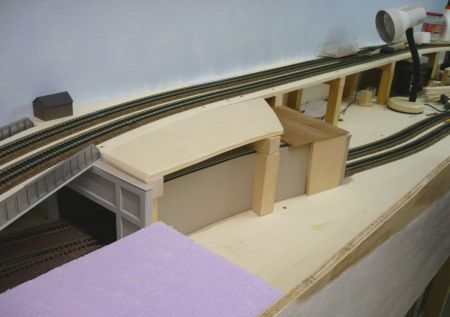
| 10/03/08:
The short tunnel is closed and covered. I used gray cardboard inside to
have an almost realistic view when you look thru the tunnel. Between the
tunnel and the front I put styrofoam pieces in diff. height to make it
look like a step. The styro will be sanded / carved to create a street
going downhill. This road will connect the lower and the upper level. So,
we will have a continous street system on this layout. |
 |
 |
| 10/03/08 Gray
cardboard will simulate the tunnel walls - 397 |
The top will give
a slopy landscaping - 398 |
 |
 |
| 10/03/08 This
space to the right will become a street - 399 |
Only the first
piece of styro for the street is in place - 400 |
 |
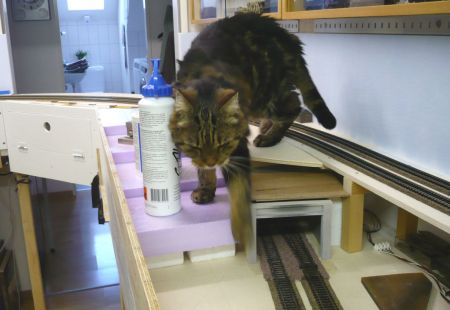 |
| 10/03/08 Our
supervisor found a new platform to sit - 401 |
Once again, he
has to check the construction - 402 |
 |
 |
| 10/03/08 Styro
steps from above - 403 |
and from below.
Thru sanding the street, I will get a steady grade 404 |